Sunday column
Starting Seeds Indoors
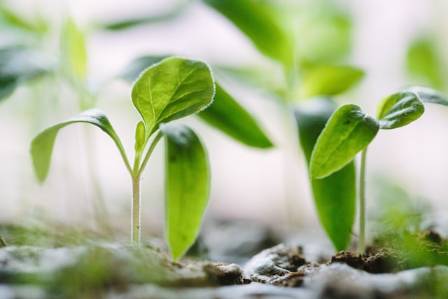
Starting plants from seed may feel intimidating when you first try it, but the advantages make the effort worthwhile for many home gardeners. Growing from seed gives you access to far more plant varieties than you may find at a local nursery, and it can also significantly reduce the cost of filling your garden.
Luca Sterling
Desk editor
Editor’s note
The full column continues in quiet type below.
Section
Sunday Broadsheet
Starting plants from seed may feel intimidating when you first try it, but the advantages make the effort worthwhile for many home gardeners. Growing from seed gives you access to far more plant varieties than you may find at a local nursery, and it can also significantly reduce the cost of filling your garden.
Starting your own seedlings also gives you greater control over how many plants you grow. You can produce exactly the number your garden needs, or raise extras to give to friends, family members, and neighbors.
What You Need to Get Started
Light
Different seeds have different requirements when it comes to germination. Some need exposure to light, while others germinate best in complete darkness. Check the information on your seed packet to determine what each variety requires.
Once the seeds have sprouted, however, all young seedlings need adequate light to develop strong stems and healthy foliage. Newly emerged plants generally perform well with around 16 hours of light each day.
If possible, arrange fluorescent or LED fixtures above your seed trays, leaving enough room underneath for the growing plants. If you do not own grow lights, there is no reason to give up on indoor seed starting. Find the brightest location available, preferably a south-facing window where the seedlings can receive plenty of natural light.
Containers
Almost any shallow container can work for starting seeds. Seed trays, flats, small pots, recycled egg cartons, cut-down milk cartons, and even cardboard toilet paper tubes can all be useful. Experiment with different options to find the containers that suit your growing setup.
Whatever you choose, make certain that the containers are clean and provide adequate drainage. Add holes to the bottom if necessary.
If you are reusing old pots or trays, sanitize them before planting. One option is to soak and wash them in a mixture containing approximately 90 percent water and 10 percent bleach.
Fiber and peat containers require special attention because their dry material can absorb moisture from the growing medium. Soak these containers thoroughly with water before filling them with your planting mix.
Seeds
Choosing seeds is one of the most enjoyable parts of starting a garden. There are countless interesting varieties available through seed companies, online suppliers, and local garden stores.
For the highest germination success, choose fresh seed packaged for the current growing season. If you are using seed left over from the previous year, test its germination rate before planting a large crop.
Ideally, at least 70 percent of the seeds should successfully germinate. This gives you a good indication that the seed remains viable and should perform adequately during the growing season.
Growing Medium
The growing medium you choose can have a major influence on germination success. Use a lightweight, soilless product specifically formulated for starting seeds.
Look for mixes described as “seed starting” or “germinating” mixtures. Common ingredients include peat moss, coconut coir, perlite, and vermiculite.
Avoid using ordinary garden soil or standard products labeled “potting soil” for germinating seeds. A dedicated seed-starting mix provides the lighter, more suitable conditions young roots need.
Which Seeds Should Be Started Indoors
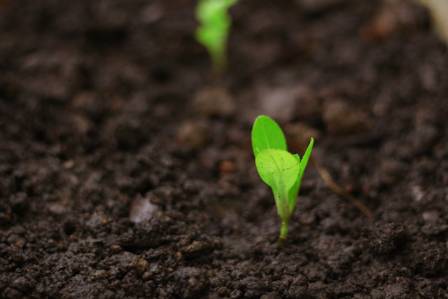
Several vegetables benefit from being started inside before being moved into the garden. These include members of the cabbage family, such as cabbage, broccoli, cauliflower, and kale, along with onions, tomatoes, eggplants, tomatillos, and peppers.
Other crops can certainly be started indoors, but doing so is not always necessary. Vegetables that prefer cool conditions, including peas, lettuce, spinach, and many root crops, can generally be sown directly outdoors as early as April.
Warm-season crops such as cucumbers, squash, and beans can usually be planted directly into the garden around the middle or latter part of May. Always consult the information provided on individual seed packets to determine the appropriate sowing time for your location.
Sowing Your Seeds
Begin by filling your containers with seed-starting mix, leaving approximately ¼ inch of space below the rim. Smooth and level the surface, then thoroughly moisten the growing medium and allow excess water to drain before planting.
Create a small planting hole for each seed using your fingertip or a pencil. As a general guideline, most seeds should be buried at a depth roughly two to three times their width.
Very small seeds require different treatment. Instead of burying them deeply, cover them with only a thin layer of fine growing medium.
After sowing, place the containers on a shallow tray with drainage holes. This setup makes it possible to provide water from underneath, reducing the chance of disturbing newly planted seeds or tiny emerging roots.
Maintaining Moisture During Germination
While seeds are sprouting, the growing medium should remain consistently damp without becoming saturated. Excessive moisture can cause seeds to rot before they have a chance to develop.
For newly planted seeds and very small seedlings, a fine misting sprayer works well. When possible, bottom-watering is another effective method because it minimizes disturbance to the seeds.
To maintain consistent humidity, place the seed containers inside clear plastic bags or cover them with a humidity dome. This helps prevent the growing medium from drying too quickly and reduces the need for frequent watering.
If using a clear humidity dome, remove it briefly each day and gently blow across the soil surface before putting the cover back in place. The added carbon dioxide can help shorten germination time.
Inspect the containers every day. Once the first seedlings emerge from a flat or tray, remove the clear dome completely and leave it off.
Caring for Young Seedlings
The period immediately after germination is extremely important. Continue providing moisture, but avoid keeping the soil saturated.
For the first two or three days, use warm water when watering the newly planted seeds. After germination, switch to water that is slightly warmer than normal room temperature. Continue using bottom-watering whenever practical.
Because small containers and seed trays can dry out quickly, inspect them regularly. A simple way to test the soil is to insert a sharpened pencil about ¼ inch into the growing medium. If damp soil clings to the tip, there is no need to water yet.
Seedlings grown beside a window should be rotated frequently so they receive light evenly and develop upright stems instead of leaning toward the glass.
When using artificial lights, position the fixtures directly above the seedlings once they emerge. Keep the lights very close to the plants, roughly 2–3 inches above their tops, and gradually raise the fixtures as the seedlings become taller.
After the seedlings have grown for several weeks, you may find that two plants have successfully emerged from the same cell. Once both are established, use a small pair of scissors to cut the weaker plant as close to the soil surface as possible.
Leave the shorter, stronger, more compact seedling in place. Although removing a healthy-looking seedling can seem difficult, overcrowding prevents the remaining plants from developing the space and resources necessary for strong growth.
Getting Seedlings Ready for the Outdoors
After approximately six to eight weeks, most seedlings should be large enough to transplant. Healthy transplants should be relatively short and compact, with sturdy stems and a well-developed root system.
About one week before moving them permanently into the garden, begin the process known as hardening off. Indoor-grown seedlings have been sheltered from wind, cool temperatures, and intense sunlight, so they need time to adjust gradually to outdoor conditions.
Start by placing the plants outdoors in a protected, shady location. If nighttime temperatures are expected to fall below 55°F, bring them back indoors overnight.
Each day, gradually expose the seedlings to more sunlight and extend the amount of time they remain outdoors. Protect them from strong winds during this adjustment period as well.
Keep the seedlings adequately watered while they are hardening off. If slugs are a problem in your garden, avoid placing the containers directly on the ground. Also inspect the plants frequently for insects, since young, tender seedlings can be especially attractive to pests.
Transplanting Into the Garden
Avoid moving seedlings outdoors too early. For plants that cannot tolerate frost, wait until the threat of frost has completely passed before transplanting them into the garden.
Before planting, thoroughly water both the garden soil and the seedlings. Well-hydrated plants are less likely to suffer from transplant shock. If possible, choose a cloudy day for transplanting so that newly moved seedlings are not immediately exposed to intense sunlight.
Carefully remove each seedling from its container. Handle it gently and avoid pulling the plant by its stem, which can cause serious damage.
Prepare a planting hole approximately twice as wide as the seedling's root ball. Place the plant in the hole so that the root ball is covered by about ¼ inch of soil. Firmly press the surrounding soil into place around the roots.
Creating a slight depression around the base of the plant can help collect and direct water toward the root zone. Water immediately after planting and continue watering every day during the first week.
When watering, soak the soil deeply rather than applying only a small amount to the surface. Deep watering encourages roots to grow downward and helps prevent the development of weak, shallow root systems.
More from the edition
Column · en
Mountain Chicken: The Frog Fighting for Survival
Despite what its unusual name suggests, the mountain chicken is neither a chicken nor an animal that lives exclusively in the mountains. It is actually a species of frog native to the Caribbean islands of Dominica and Montserrat.
Column · en
Essential Steps for Starting a Successful Balcony Garden
Growing a personal vegetable garden filled with fresh greens, aromatic herbs, or bright cherry tomatoes is a wonderful aspiration. Even if you lack a traditional backyard, a lack of extensive outdoor acreage should not prevent you from cultivating a thriving green space. Apartment residents can easily transform an underutilized patio or balcony into a lively and joyful sanctuary. Urban container gardening allows you to experience all the therapeutic and practical benefits of agricultural production within a small footprint. All you truly need to begin this rewarding journey is a sturdy balcony railing, a selection of appropriate containers, a few basic tools, and a willingness to learn and experiment with nature.
Column · en
Hidden Histories of Famous Animated Figures
Most of us hold fond memories of the cartoons that defined our youth. Whether it was the frantic energy of Donald Duck or the mystery-solving adventures of Scooby-Doo, animation has spent nearly a century evoking deep emotional responses in audiences.
Column · en
Crispy Chocolate Chip Cookies
These ultra-crispy chocolate chip cookies deliver an incredibly satisfying bite. The edges bake up deeply golden, buttery, and crunchy, while the center stays thin, slightly chewy, and full of flavor. Even better, they’re simple to make—mixed entirely by hand in a single bowl and baked right away. With chopped dark chocolate and a touch of flaky sea salt, they strike the perfect balance of rich, bold, and not overly sweet.
Column · en
Top 7 Matcha Cakes Loved by Vietnamese Millennials
In recent years, matcha cakes have become a defining dessert trend across Vietnam, appearing frequently in cafés, bakeries, and online food culture. Admired for their subtle bitterness, smooth textures, and eye-catching green color, these cakes reflect a blend of Japanese refinement and Vietnamese creativity. From birthday celebrations to casual coffee breaks, matcha desserts have come to symbolize modern taste, balance, and a wellness-oriented lifestyle among Vietnamese millennials.
Column · en
Key Insights into the Nature of Black Holes
A black hole is fundamentally a region in space where the gravitational pull is so intense that nothing can escape its grasp. This extreme gravity is the result of matter being squeezed into a tiny space. While these cosmic entities may seem mysterious, understanding their characteristics helps clarify how the universe operates at its most extreme limits.